
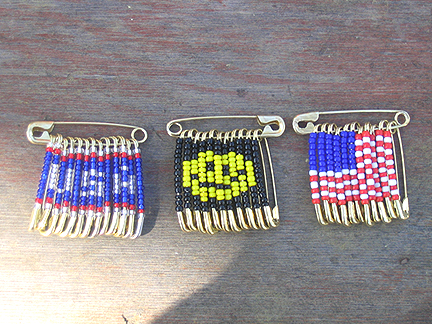
Friendship Pins
|
Materials Needed for the Project:
* Seed Beads (several colors)
* (1) 1.5" Gold Safety Pin
* (11-13) 1.25" Gold Safety Pins
* Needle Nose Pliers & Split Ring Pliers
* Friendship Pin Patterns (see below)
|
|
|
|
Creating a Friendship Pin is quite simple, but requires a fair amount of time. Use the patterns below as a guide. Each vertical row from the patterns represents the smaller 1.25" safety pin with beads strung on it. Open these pins and string beads following the pattern. Start at the top with of each row and work down. Use the needle nose pliers to squeeze the pin head closed permanently. When choosing beads for stringing, try to use those that are of an average size. since seed beads are irregular in size, you don't want to use those beads that are too large or too small.
After you have strung the beads on all of the 1.25" safety pins, use the split ring pliers to bend open the coil at the base of the 1.5" pin. Then thread the coil of the beaded pins onto the front shank of larger pin, forcing them around the opened coil and onto the back shank of the larger pin. Be sure to follow the pattern working from right to left. When all of the smaller pins are on the larger one, close the coil of the larger pin with the needle nose pliers.
 |
|
|
|
|